Links
Fay Marine Photographs 9
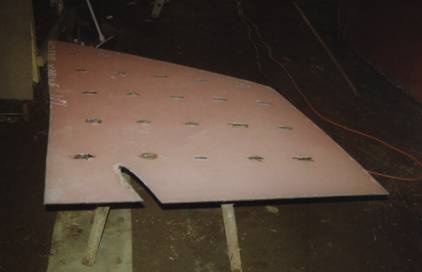
The second plate for the skeg. Before the first side was fitted, this plate was offered up and the position of the web floors marked to enable the accurate cutting of short slots so that this side can also be welded through the slots to the web floors. An ellipse has also been cut to fit round the propeller tube.
Once fully welded the skeg is pressurised and checked for leaks with soapy water. I always do this on tanks, however, if the tank is carefully welded and then painted out with epoxy paint any pin holes should be sealed by the paint. The inside of tanks such as this skeg are impossible to paint.
I found it interesting to note that in the shipyard that I was associated with, they found that it was almost impossible to make a fluid tight joint by M.I.G. welding. So when constructing tanks at least one side of the construction was welded with 'stick' welding which ensured a good seal.
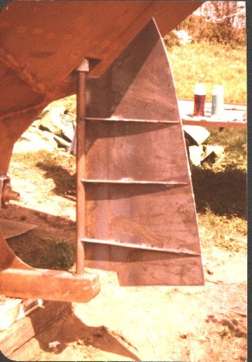
A rudder on a Bruce Roberts Spray under construction showing the internal webs to hold the shape. The webs can be welded to one side as in the picture. When the opposite side is fitted a few slots can be cut to weld through joining the plate to the webs, the same as with the skeg.
Some people like to make an access point into a sealed section such as a rudder to enable them to pour a little oil inside. I do not bother as if water does enter once the oxygen is used there will be no more corrosion. Anyway the welding should be watertight and if there were a pin hole the paint should seal it.
This yacht has been built from bare steel. Handling bare, rusty steel is incredibly dirty and grit blasting a complete hull inside and outside is a difficult, dirty, expensive, time consuming job. If done properly it does make a slightly better surface for the paint to adhere to compared to pre blasted steel and also slightly relieves the welding stresses, but in my opinion is never worth the extra effort.
There are many versions of 'rust curing' primers which make great claims. It would appear from the instructions, that the steel only needs wire brushing before the paint is applied. These paints usually contain a small amount of Phosphoric Acid which in its neat form is a reasonable rust converter, but in the marine environment these primers do not produce a good enough surface for the paint to grip and in practice it has been found that a paint system based on this fails quickly.
You are spending an enormous amount of money on your yacht, so it is good to get the basics correct - Spend the money on blasting and a good epoxy paint system!!!
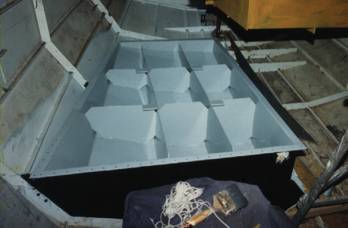
A steel water tank. This one is not welded in. The baffles can clearly be seen. They need to leave a maximum of about 15" x 15" of free surface area to be really effective at stopping the fluid surging and being very noisy.
The corners of the baffles have been cut to allow enough flow for filling etc. The whole top will be bolted on and at the junction of the baffles there is a small plate for the lid to also be bolted to.
The whole inside has been painted with epoxy.
Behind the tank, the extra, short web floors to support the skeg can be seen. In the past some yards did not fit these extra web floors which led to the hulls cracking due to constant flexing, especially on long passages. Whether building or buying a yacht, ensure they have been fitted.
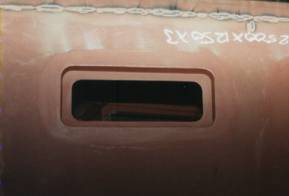
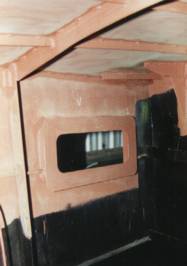
Recessed hull ports from both outside and inside. If it is decided to recess the ports then flat bar is bent to the shape and welded in place. On the inside flat plate is welded to this bar. It is good to make the oversize to allow fixing the interior plywood.
On my own yacht I have not used this system. I have drilled and tapped the hull all round the port, then screwed long stainless pan head bolts through from the outside.
On the inside these bolts pass through the perspex, and then through a steel backing plate, with foam tape between steel and perspex to seal and cushion the port. The overlong bolts then have a timber port surround placed over them and the internal lining screwed to them.
©Paul Fay 2004