Links
Fay Marine Photographs 10
Pages 10, 11 & 12 contain detail pictures of subjects that I am often asked about.
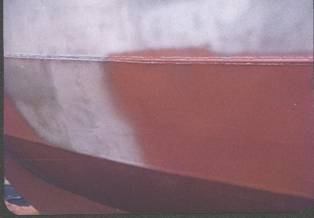
A photo which shows the colour of the steel after grit-blasting to 'commercial quality', perfectly adequate for the hull of a steel yacht. On the outside of a hull built from bare steel this is easy to achieve, however the inside is a totally different matter. There are many difficult and time consuming corners to blast around frames etc. and the blasting grit will need, first sweeping and shovelling out and then hoovering clean before it can be primed. I have done this and will never do it again as it an awful process which becomes irrelevant if the vessel is built from pre-blasted steel.
My experience has shown that it is best to build from pre-blasted and primed steel. The methods described on this site will produce a high level of protection for the steel at the most effective cost in both time and money.
This yacht (a Bruce Roberts Spray) uses round bar to form the chines and the welds will need grinding down to produce a smooth finish.
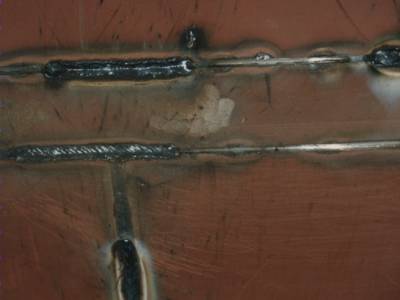
Outside welding on a hull. I have tried fitting the plates and the final welding several ways. Some builders prefer to fit the plates leaving a gap for welding. I have found this to be difficult in practice. Some builders fit the plates close and then turn the welder to a high amperage to 'melt through'. But can you be sure that complete penetration has been achieved?
My method is to fit the plates without a welding gap. I then make a light, continuous weld inside. (only welding 2 or 3 inches at a time to minimise distortion) Then on the outside I grind the joint with a cutting disc, through to the internal weld, as can be seen in the photograph, and then fully weld the outside. This ensures near perfect penetration.
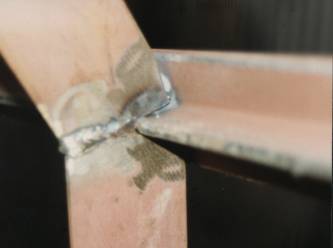
This is a 'T' section chine bar fitted into the frame. It has just been spot welded in place, otherwise the heat will allow it to kink around the frame rather than making a gentle curve from bow to stern.
There are two reasons for spot welding it in place. The first is to ensure that the frame remains square to the centre line. The second is that the frame is cut away above the bar to allow drainage of condensation and this would allow the chine bar to twist.
Once the hull has been plated then the chine bars, stringers, edge of the topsides bar etc. can all be welded solidly and the fair curve from bow to stern will remain.
On the topsides I never weld the hull plate to the frames as this is the major cause of the plates pulling in and leading to the 'hungry horse with all it's ribs showing' look that can be seen on some yachts and nearly all warships. I only weld the topsides to the stringers which are solidly welded to the frames. Horizontal distortion caused by welding the stringers is far less noticeable than vertical distortion. Often the topsides plate will 'belly' out away from the frame, I allow this to happen and once all is in place I use a wedge to push the stringers out to touch the plate before final welding. Due to the shape of most yachts, below the waterline the plate tends to hug the frames closely and as the distortion will not be seen here I 'stitch' weld the plates to the frames.
©Paul Fay 2004